
How to Build a Drum Kit From a Song's Drum Stem
A step-by-step Beat Studio workflow for cutting kick, snare and tom samples from a song's drum stem, shaping them, and playing the song on its own drum sound.
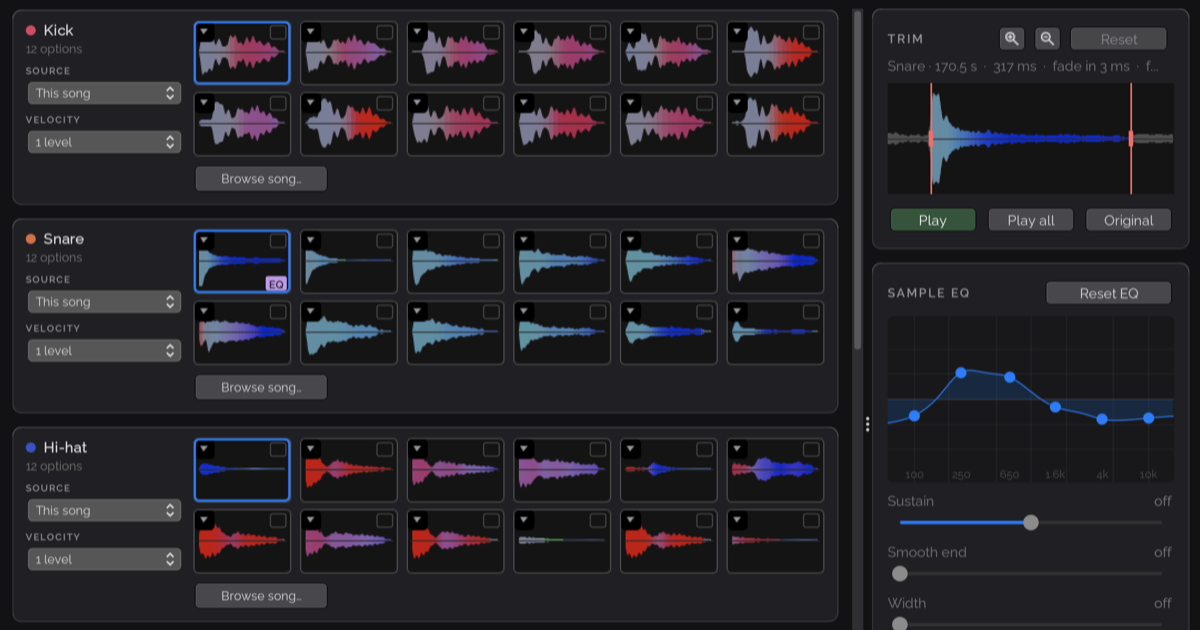
Practicing along with a song is fun. Practicing along with a song while your kit sounds like the record is something else. Since Beat Studio 1.8, you can cut drum samples straight from a song’s drum stem and turn them into a kit you play on your own pads.
The release post covers what the tools are. This one is the workflow I actually use, in order, with the decisions that make the difference between a kit that sounds like the song and one that sounds like a bad bootleg.
Before you start
The song kit builder cuts its samples at the hits on the pattern grid. That means two things need to be in place first:
-
The song is imported with its drum stem.
-
The song has a pattern whose hits sit on the music. There are two ways to get one:
- From a MIDI or Guitar Pro file. This is the easiest route. In the pattern creation wizard, choose to start from an audio recording together with a MIDI or Guitar Pro file. Beat Studio matches the file’s drum hits to the drum stem automatically and syncs them to the recording. If the match is uncertain, the kick alignment view opens so you can nudge or pin hits. Often aligning the first hit is enough.
- From the audio alone. With no file, the Extract tool detects kick, snare, hi-hat and crash hits directly from the recording.
Either way, the result is a variable tempo map that keeps the hits on the grid even when the band drifts.
One caution with downloaded files: many free MIDI and Guitar Pro files only cover part of the song, or have hits the drummer never played. Where the file and the recording disagree, the builder cuts a clip at the wrong spot, so fix those hits before moving on.
A clean pattern is the foundation of a good kit. Every hit on the grid becomes a sample candidate, so a kick marked where there’s actually a snare gives you a snare in your kick row.
Step 1: Open the song kit builder
Give the kit a name first. The builder then shows one row per drum — kick, snare, hi-hat, open hi-hat, toms, cymbals — each filled with clips cut from the drum stem.
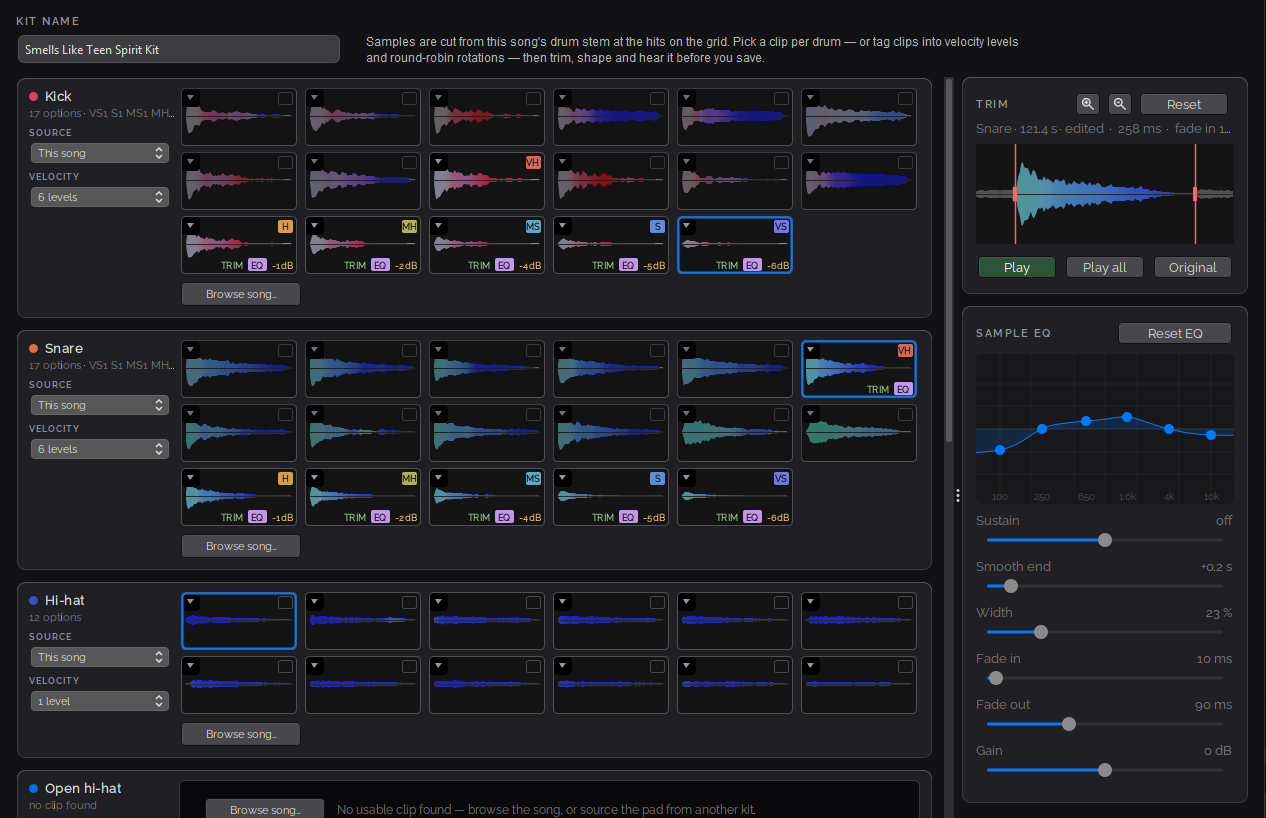
Each row starts with a set of sample candidates: clips cut from the stem at that drum’s hits. They’re a starting point, not the full list. Browse song… under each row lets you pick more hits from anywhere in the song. Clicking a clip loads it into the Trim and Sample EQ panels on the right, and each row also has its own Source and Velocity selectors.
Step 2: Pick the best clips
This is the step that matters most, so take your time. Click through the clips and listen to each one. You’re looking for hits that:
- Stand alone. A kick with nothing else ringing over it beats a louder kick buried under a crash. Intros, breakdowns and fills are usually where the cleanest hits live.
- Sound like the song. The loudest clip isn’t always the most characteristic one.
- Have a clean start. If the start of the clip is smeared by the previous hit, skip it.
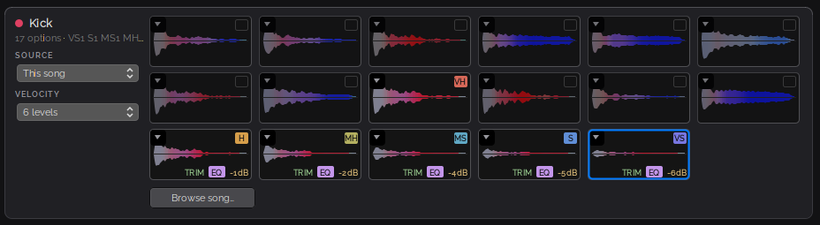
Don’t be surprised if only a handful of clips are usable. A drum stem comes out of a full mix, so bleed from other instruments and other drums is normal. If none of the candidates are good, use Browse song… to find a better hit elsewhere in the song.
Step 3: Shape each sample
With a clip selected, the right-hand panels are where it goes from “cut out of a song” to “playable sample”.
Trim first. Drag the start handle right up to the attack of the hit — any silence or leftover sound before it makes the pad feel late under your sticks. Drag the end handle to cut off the next hit if it bleeds in. Use Play to hear the result and Original to compare it with the untouched clip.
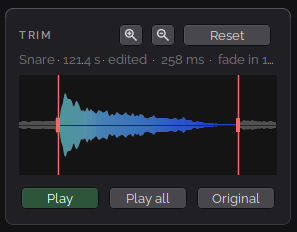
Then open the Sample EQ. Stems pulled from a finished mix often come out too bright, so a gentle cut in the top bands is a good first move. Add low end to a thin kick, or a little body around the mids to a snare.
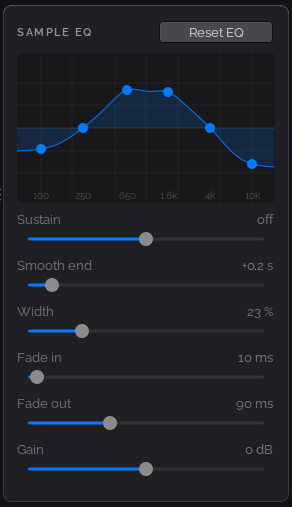
Below the EQ:
- Smooth end adds a natural decay to a sample that stops mid-ring. Use it whenever you had to trim the tail short to get rid of the next hit.
- Fade in and Fade out soften the edges. Keep fade in short or off on drums, or the attack loses its punch.
- Gain evens out levels between drums, so the snare doesn’t jump out over the kick.
The tail is where most samples succeed or fail. Because of bleed, the end trim, Fade out and Smooth end are often the most important settings to get right. The start of a hit is usually clean. The tail is where the other drums keep ringing and the next hit arrives. Try several versions:
- Pull the end trim in until the ring from other pads or the next hit is gone.
- Shape the cut with Fade out so it doesn’t click.
- Add Smooth end to give the sample a natural decay again.
Listen to each version with Play and compare it with Original. Cutting a bit shorter and letting Smooth end rebuild the decay often sounds cleaner than keeping a long tail full of bleed.
Step 4: Add dynamics
A real drummer doesn’t hit every note at the same strength, and a kit with one sample per drum sounds flat the moment you play a ghost note. You have two ways to fix that.
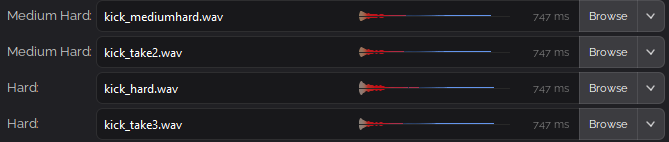
Tag real hits into velocity levels. Set the drum’s Velocity to the number of levels you want, then tag clips from Very Hard down to Very Soft. This sounds the most natural, but only works if the song actually has hits at different strengths — and most rock and pop recordings don’t.
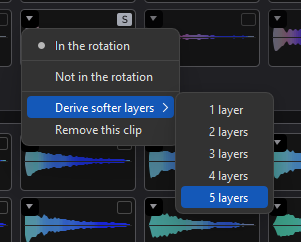
Derive softer layers. Pick your best clip, open its menu and choose Derive softer layers, with anything from 1 to 5 extra layers. This is the quick option and works well for kick and snare.
My rule of thumb: tag real hits when the song gives you them, derive layers when it doesn’t.
Add round-robin for repeated hits. Put two clips on the same velocity level and they alternate, so fast sixteenth notes on the hi-hat or a double-kick run don’t sound like the same sample fired twice.
Step 5: Fill the gaps from another kit
Some drums just won’t come out of a stem cleanly. Cymbals are the usual problem: their long sustain is almost always cut off by the next hit, and the mix wash is baked into the tail. The open hi-hat often ends up with No usable clip found.
For those, change the drum’s Source from This song to another kit. Take crashes and rides from a factory kit and keep the song’s own kick, snare and toms. That combination usually sounds closer to the record than an all-stem kit.
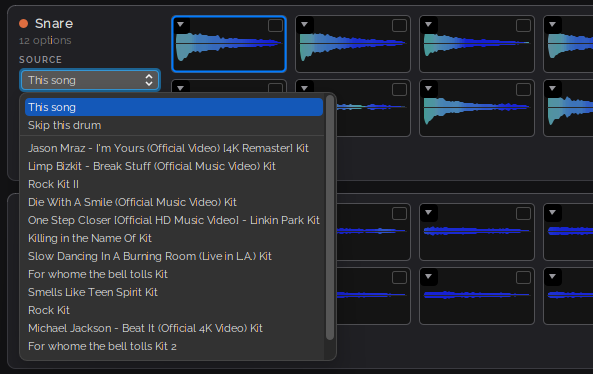
If you don’t play a drum at all, Skip this drum leaves it out.
Step 6: Save, play, and tweak
Save the kit, select it in the Kits tab, and play along with the song. The samples are copied into Beat Studio’s app data folder, so you don’t need to keep track of any files.
You can keep refining the kit afterwards in the kit editor, which has the same Trim and Sample EQ tools. Trim and EQ are stored per slot, so the source audio is never changed and you can always go back.
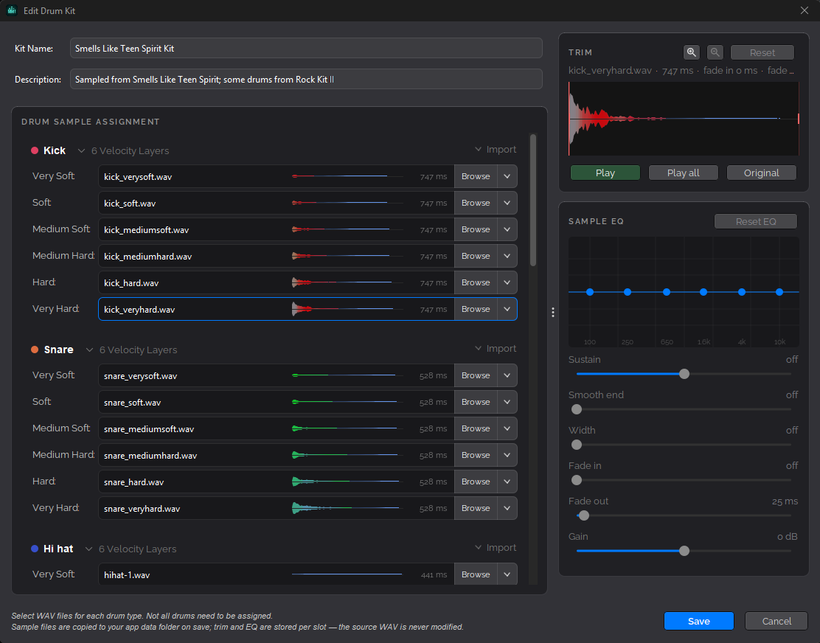
Once the samples sound right, use SENS in the mixer to set how the kit responds to your playing. That’s where the velocity layers from Step 4 really start to pay off.
When a sample doesn’t sound right
| Problem | Try this |
|---|---|
| Pad feels late | Trim the start closer to the attack and turn fade in off |
| Snare or kick sounds harsh and thin | Cut the top EQ bands, add a little low-mid |
| Sample stops abruptly | Turn up Smooth end |
| You can hear the next hit at the end | Trim the end earlier, then add Smooth end |
| Cymbal wash in the kick or snare | Pick a clip from an intro, break or fill instead |
| Ghost notes as loud as accents | Derive softer layers, then adjust SENS |
| Repeated hits sound robotic | Add a second clip on the same level for round-robin |
| One drum is too loud or quiet | Adjust Gain on that sample |
| Hi-hat or cymbals full of mix noise | Take that pad from a factory kit |
A note on songs and samples
Kits built from commercial recordings are for your own practice. The drum sound belongs to the artist and the label, so please don’t share or sell kits made from songs you don’t have the rights to.
That’s the workflow. If you build a kit you’re happy with — or hit a song where it doesn’t work — let me know on Patreon. Stems that fight back are the best way for me to improve the tools.